To create a password-protected ZIP file on Kali Linux, ensure that ‘zip’ is installed. By default, ‘zip’ comes pre-installed on Kali Linux and most major Linux distributions. Follow these steps to create a password-protected file using ‘zip‘:
1. Open the terminal by pressing “Ctrl+Alt+t” at the same time on your keyboard.
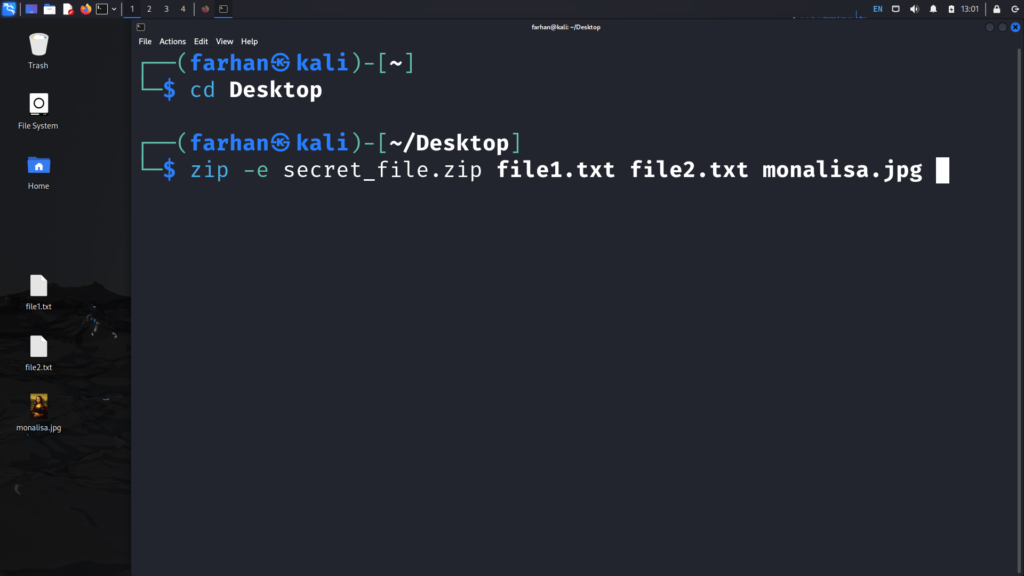
2. Navigate to the directory that contains the files you want to include in the ‘zip‘ file. You can use the ‘cd‘ command followed by the path to your files.
cd path/to/your/filesSince my files are in the ‘Desktop‘ directory, the command for me is:
cd Desktop3. Now we can use the ‘zip‘ to create a password-protected zip file. I want to create a ‘zip‘ file called ‘secret_file.zip‘. And, I want to include the files ‘file1.txt‘, ‘file2.txt‘, ‘monalisa.jpg‘. So, the command for me is:
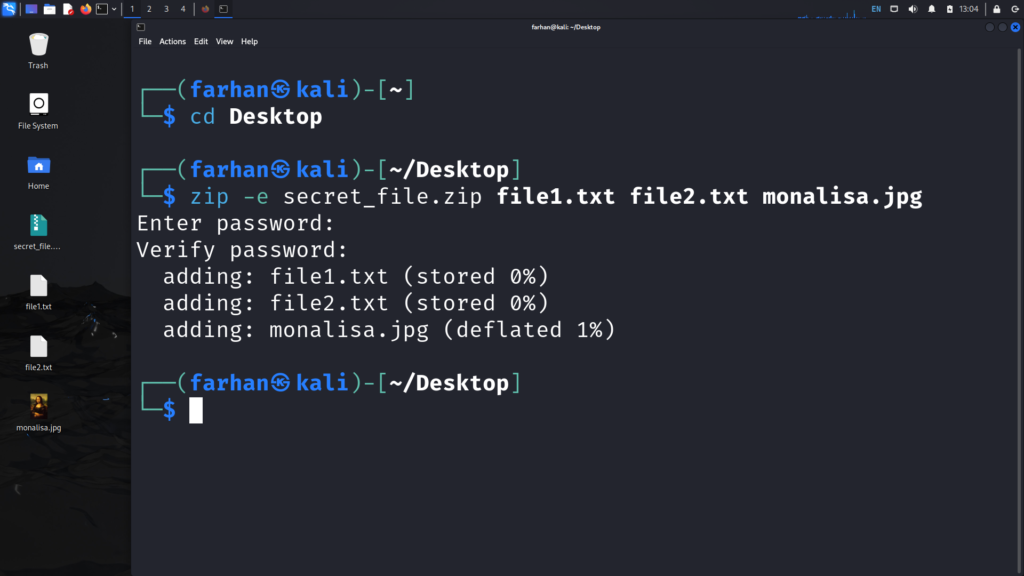
zip -e secret_file.zip file1.txt file2.txt monalisa.jpg
* Replace ‘secret_file.zip‘ with the desired ‘zip‘ file name that you want to create. Replace ‘file1.txt‘, ‘file2.txt’, and ‘monalisa.jpg‘ with the file names that you want to add to the ‘zip‘ file.
4. Enter a strong password when prompted, and then verify it by typing the same password again. You will now see that a new ‘zip‘ file has been created.

* I can confirm that the ‘secret_file.zip‘ has been created on my ‘Desktop‘
How to Extract a Password-Protected ZIP File on Kali Linux
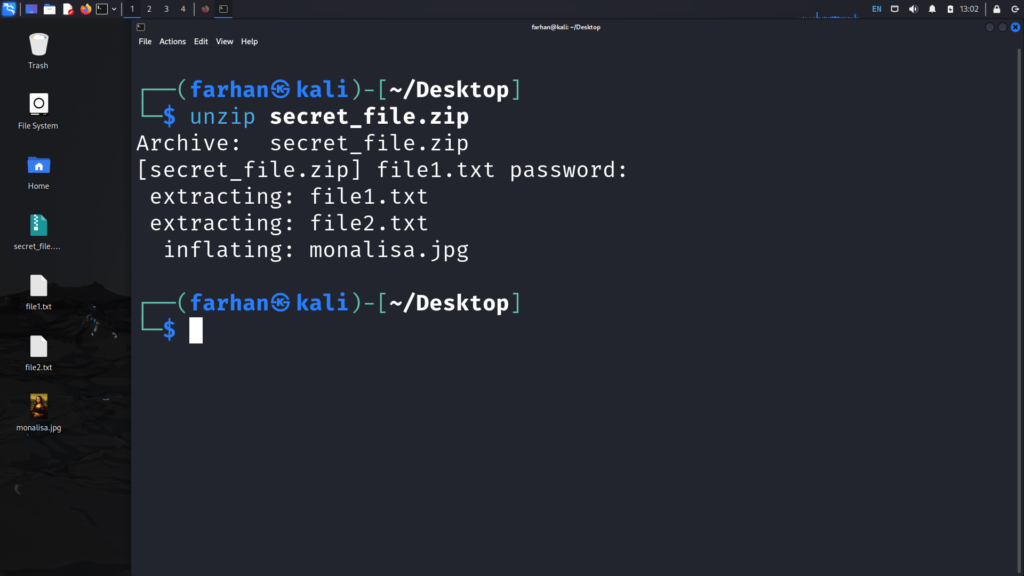
To extract a password-protected ZIP file, type the unzip command followed by the name of the ‘zip‘ file you want to extract. Since I want to extract the file called ‘secret_file.zip‘, the command for me is:
unzip secret_file.zip
When prompted for a password, type the password that you used to create the file.
That’s it! This is how you create and extract a password-protected zip file on Kali Linux
